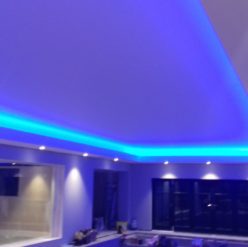
Fermacell fine surface treatment or FST is the process of getting Fermacell walls up to a decorating standard. If done well, Fermacell is a far superior product to plasterboard, or even solid plastered walls. It has the durability of a solid wall and is smoother than a plastered finish! You can fix kitchen units straight onto the wall, screwing straight into the fermacell. It has a similar density of MDF.
Call – 07863 158 455 – For a Free Quote
Who Are We?
My name is James Gallagher. I run a team of quality Tapers & Jointers. (If you would like to know more about our Taping & Jointing service click this link https://www.jgtapersandjointers.com/ ). We have finished a lot of Fermacell fine surface treatment in the last few years – Without sounding boastful – We are experts! There is a real knack to doing it correctly. Through trial and error we have tweaked our strategy. There are a couple of things that I disagree with the manufacturers.
- You DO need to sand it down at the end
- You DO need to use plasterers skim beads on the external corners.
If you have a project that you would like me to price, please get in contact. We are always looking to expand our client base and we actually prefer Fermacell fine surface treatment FST work. Its a far superior product then plasterboard. We work nationwide and offer a very professional service.
Fermacell Fine Surface Treatment FST
Call – 07863 158 455 – Now – For a Free Quote – Or Email Via My Contact Form
Fermacell Fine Surface Treatment -The Process
So, Fixers have installed the sheets of Fermacell boards. The site is ready for the finishing process. Prepare the Fermacell boards by scraping the screws and joints removing furred fermacell board, due to installation. Make sure no excess brown adhesive is hanging out on the joints (If it is, this will need removing). Knock up a small amount of Fermacell filler, about 3 litres. Vary the amount until you gain experience. This filler is very fast-setting, approximately 30 minutes – Tip – knock up with a stick. This stuff will ruin your whisk and it will take 15 minutes to clean off your whisk.
Scrape a very thin coat over screws and joints – No scrim tape is needed (Unless the Fermacell board has a tapered edged – this requires a different system). Run a thin coat of filler down internal joints as well. The filler goes very hard and cannot really be rubbed down, so less is more. If the board has a tapered edge it will need scrim, because this is not a glued system. Fermacell specification states you do not need external beads on corners – Personally, I always fit external beads. Fixers do not cut the board well enough to carry out what the specification states.
Call – 07863 158 455 – For a Free Quote

With all the above done, you are now ready for Phase 2. This is how we do it, based on about 20,000 m2 experience. We use the product Fermacell Fine Surface Treatment FST. We knock this product through adding a little water. Next we trowel out all the areas we applied filler to (nice and wide). We also trowel down the screws and run a 6 inch scraper up the internals. All this leaves is too trowel down external beads with the Fermacell FST. Leave walls to dry.
Next phase is Phase 3. Apply the Fermacell fine surface treatment to all the bare areas of board – the fermacell board is quite course. Apply liberally to all bare areas, in between screws and joints. Maybe coat up about 5-7m2, then go back and scrape most of the fine surface treatment off, placing it back in the bucket. The actual coat that is left is very thin, transparent about 0.5mm. One bucket should coat about 70m2. Go over all walls until complete. Leave to dry.

Phase 4 – Last phase use Vacuum Sanders to leave a perfect finish ready for decorators.
Call – 07863 158 455 – For a Free Quote
Fermacell Fine Surface Treatment – Why Choose Us?
- We are experts
- Vast experience of what is still an unusual system.
- Large team of tradesmen – completing large areas quickly.
- Remove uncertainty, Trying to find people who claim they can do it!
